German Short Rows

GERMAN SHORT ROWS

German Short rows are an excellent method for shaping shoulders, necklines, earflaps, and on and on. This method is simple and easier to work than the Wrap & Turn method of short row shaping. If you have had trouble with short row shaping in the past, give German Short Rows a try. I think you will be pleasantly surprised!

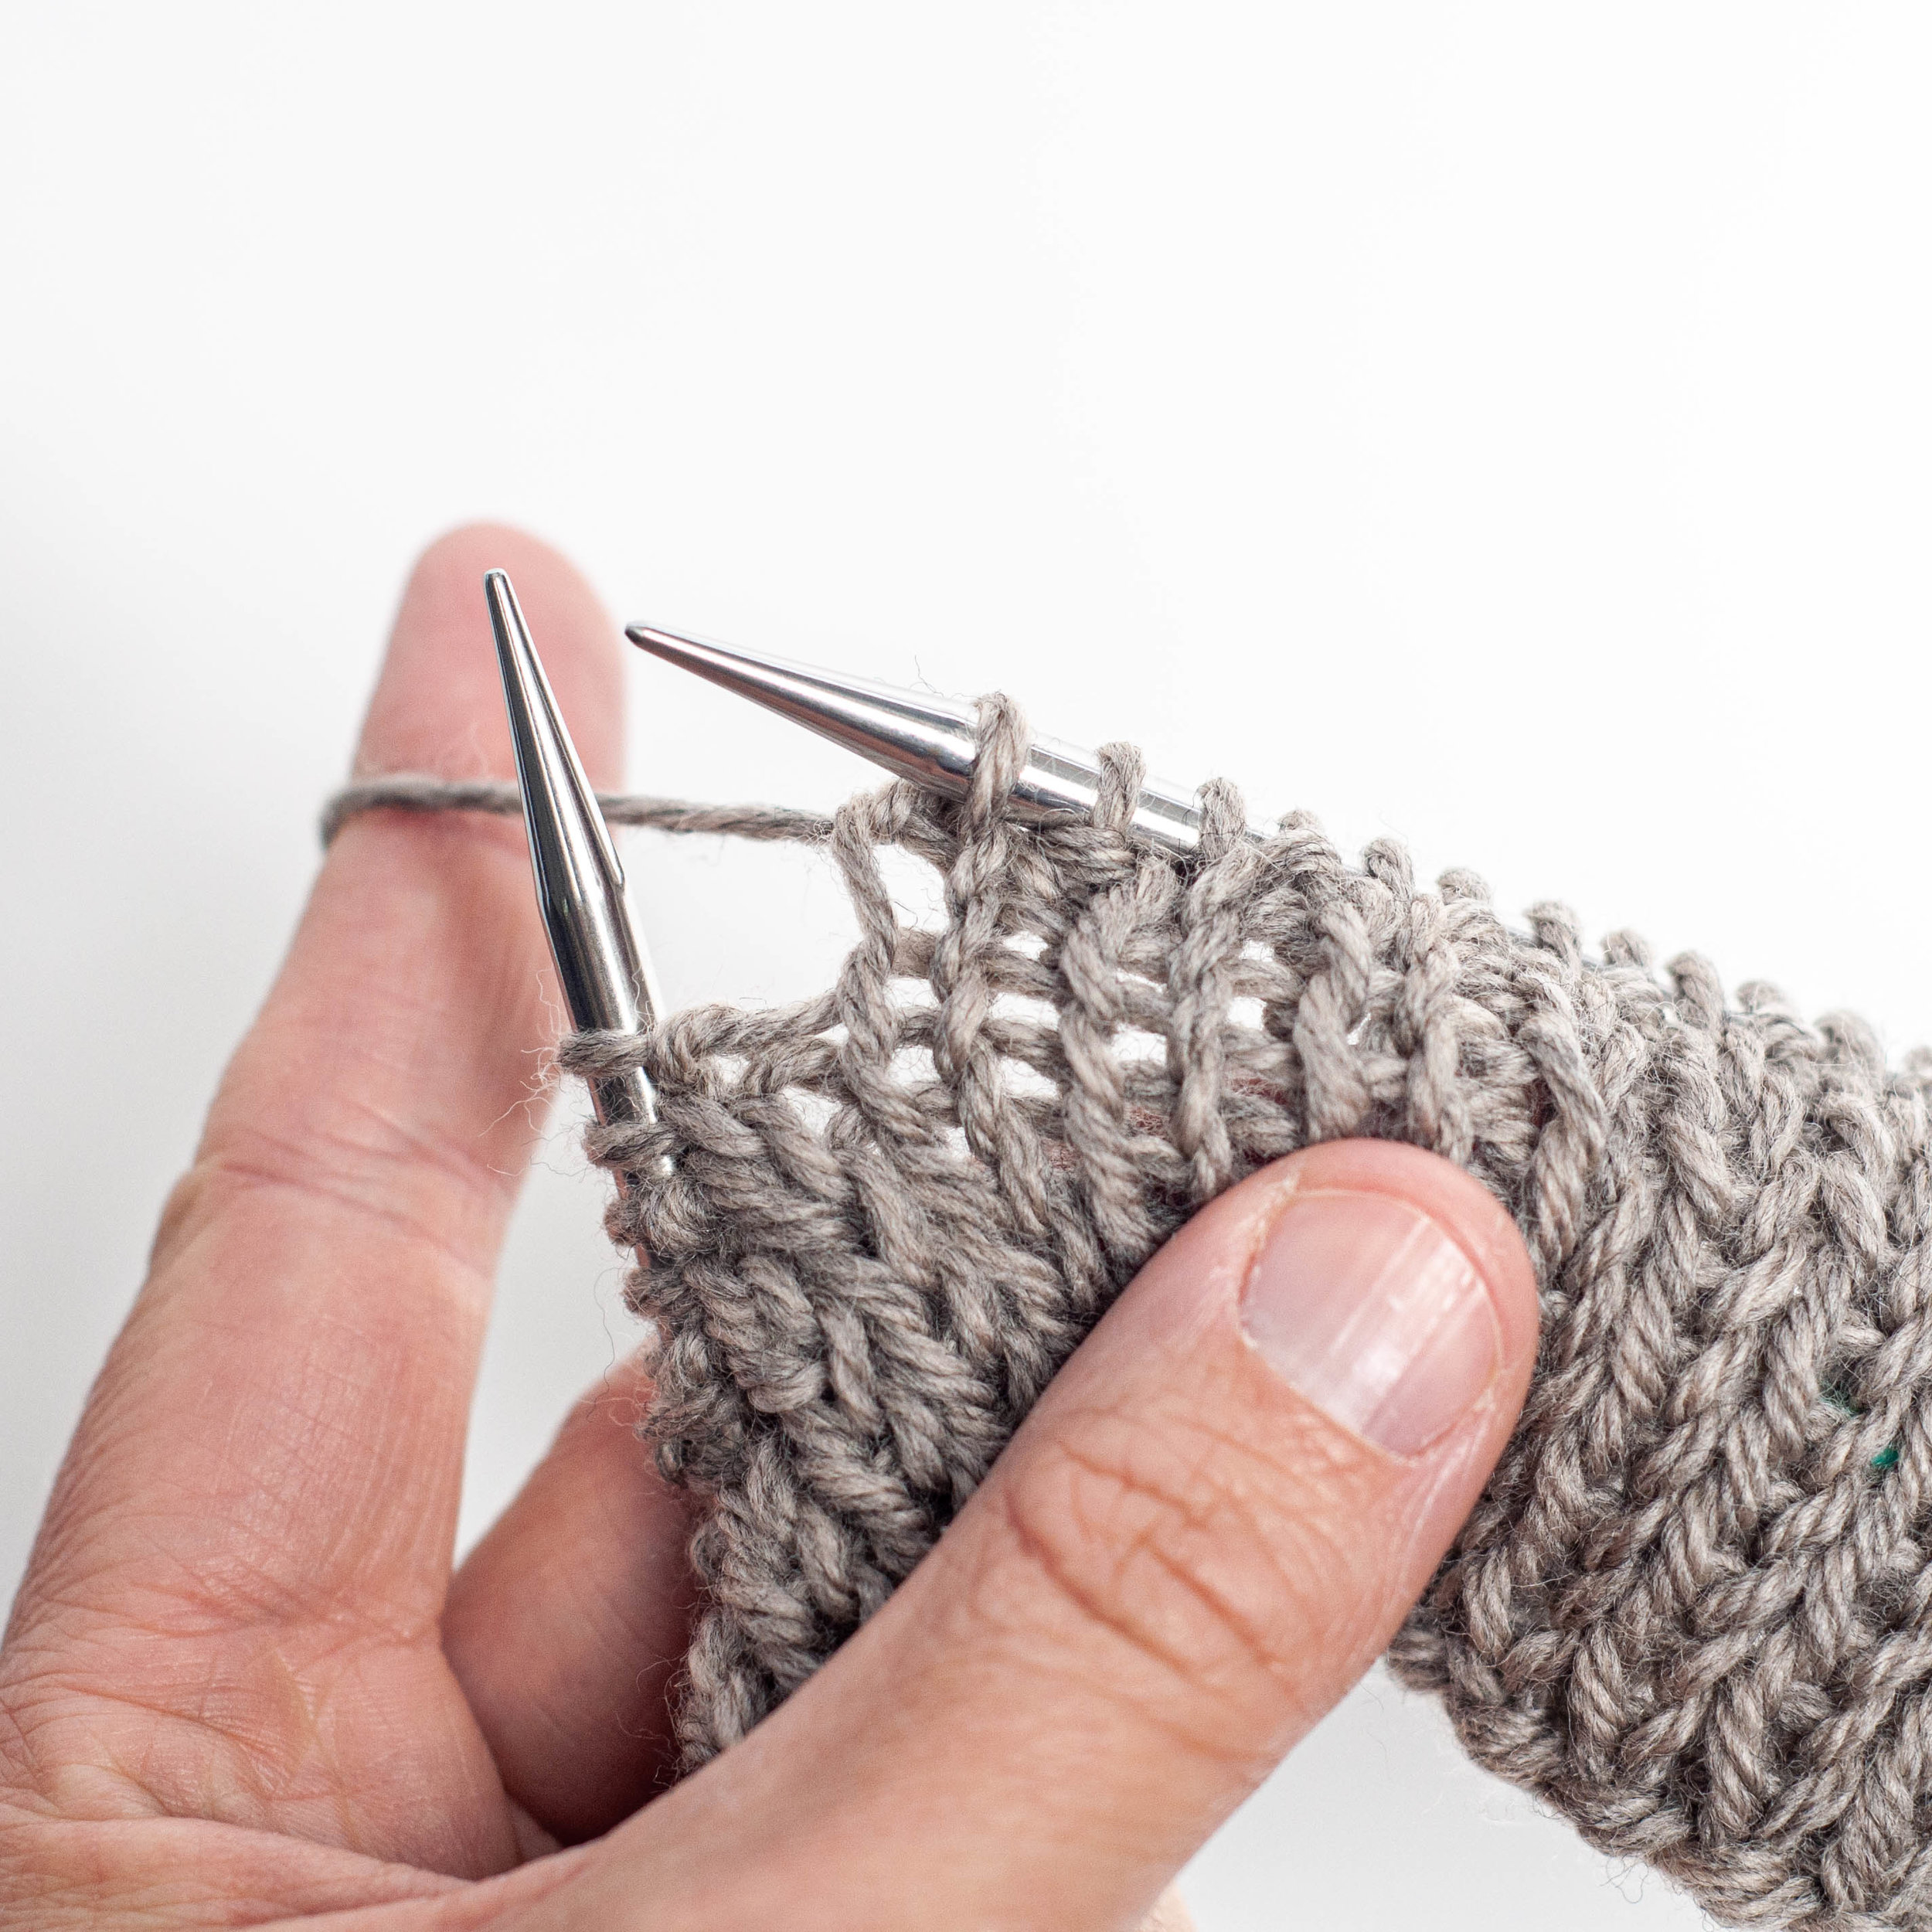
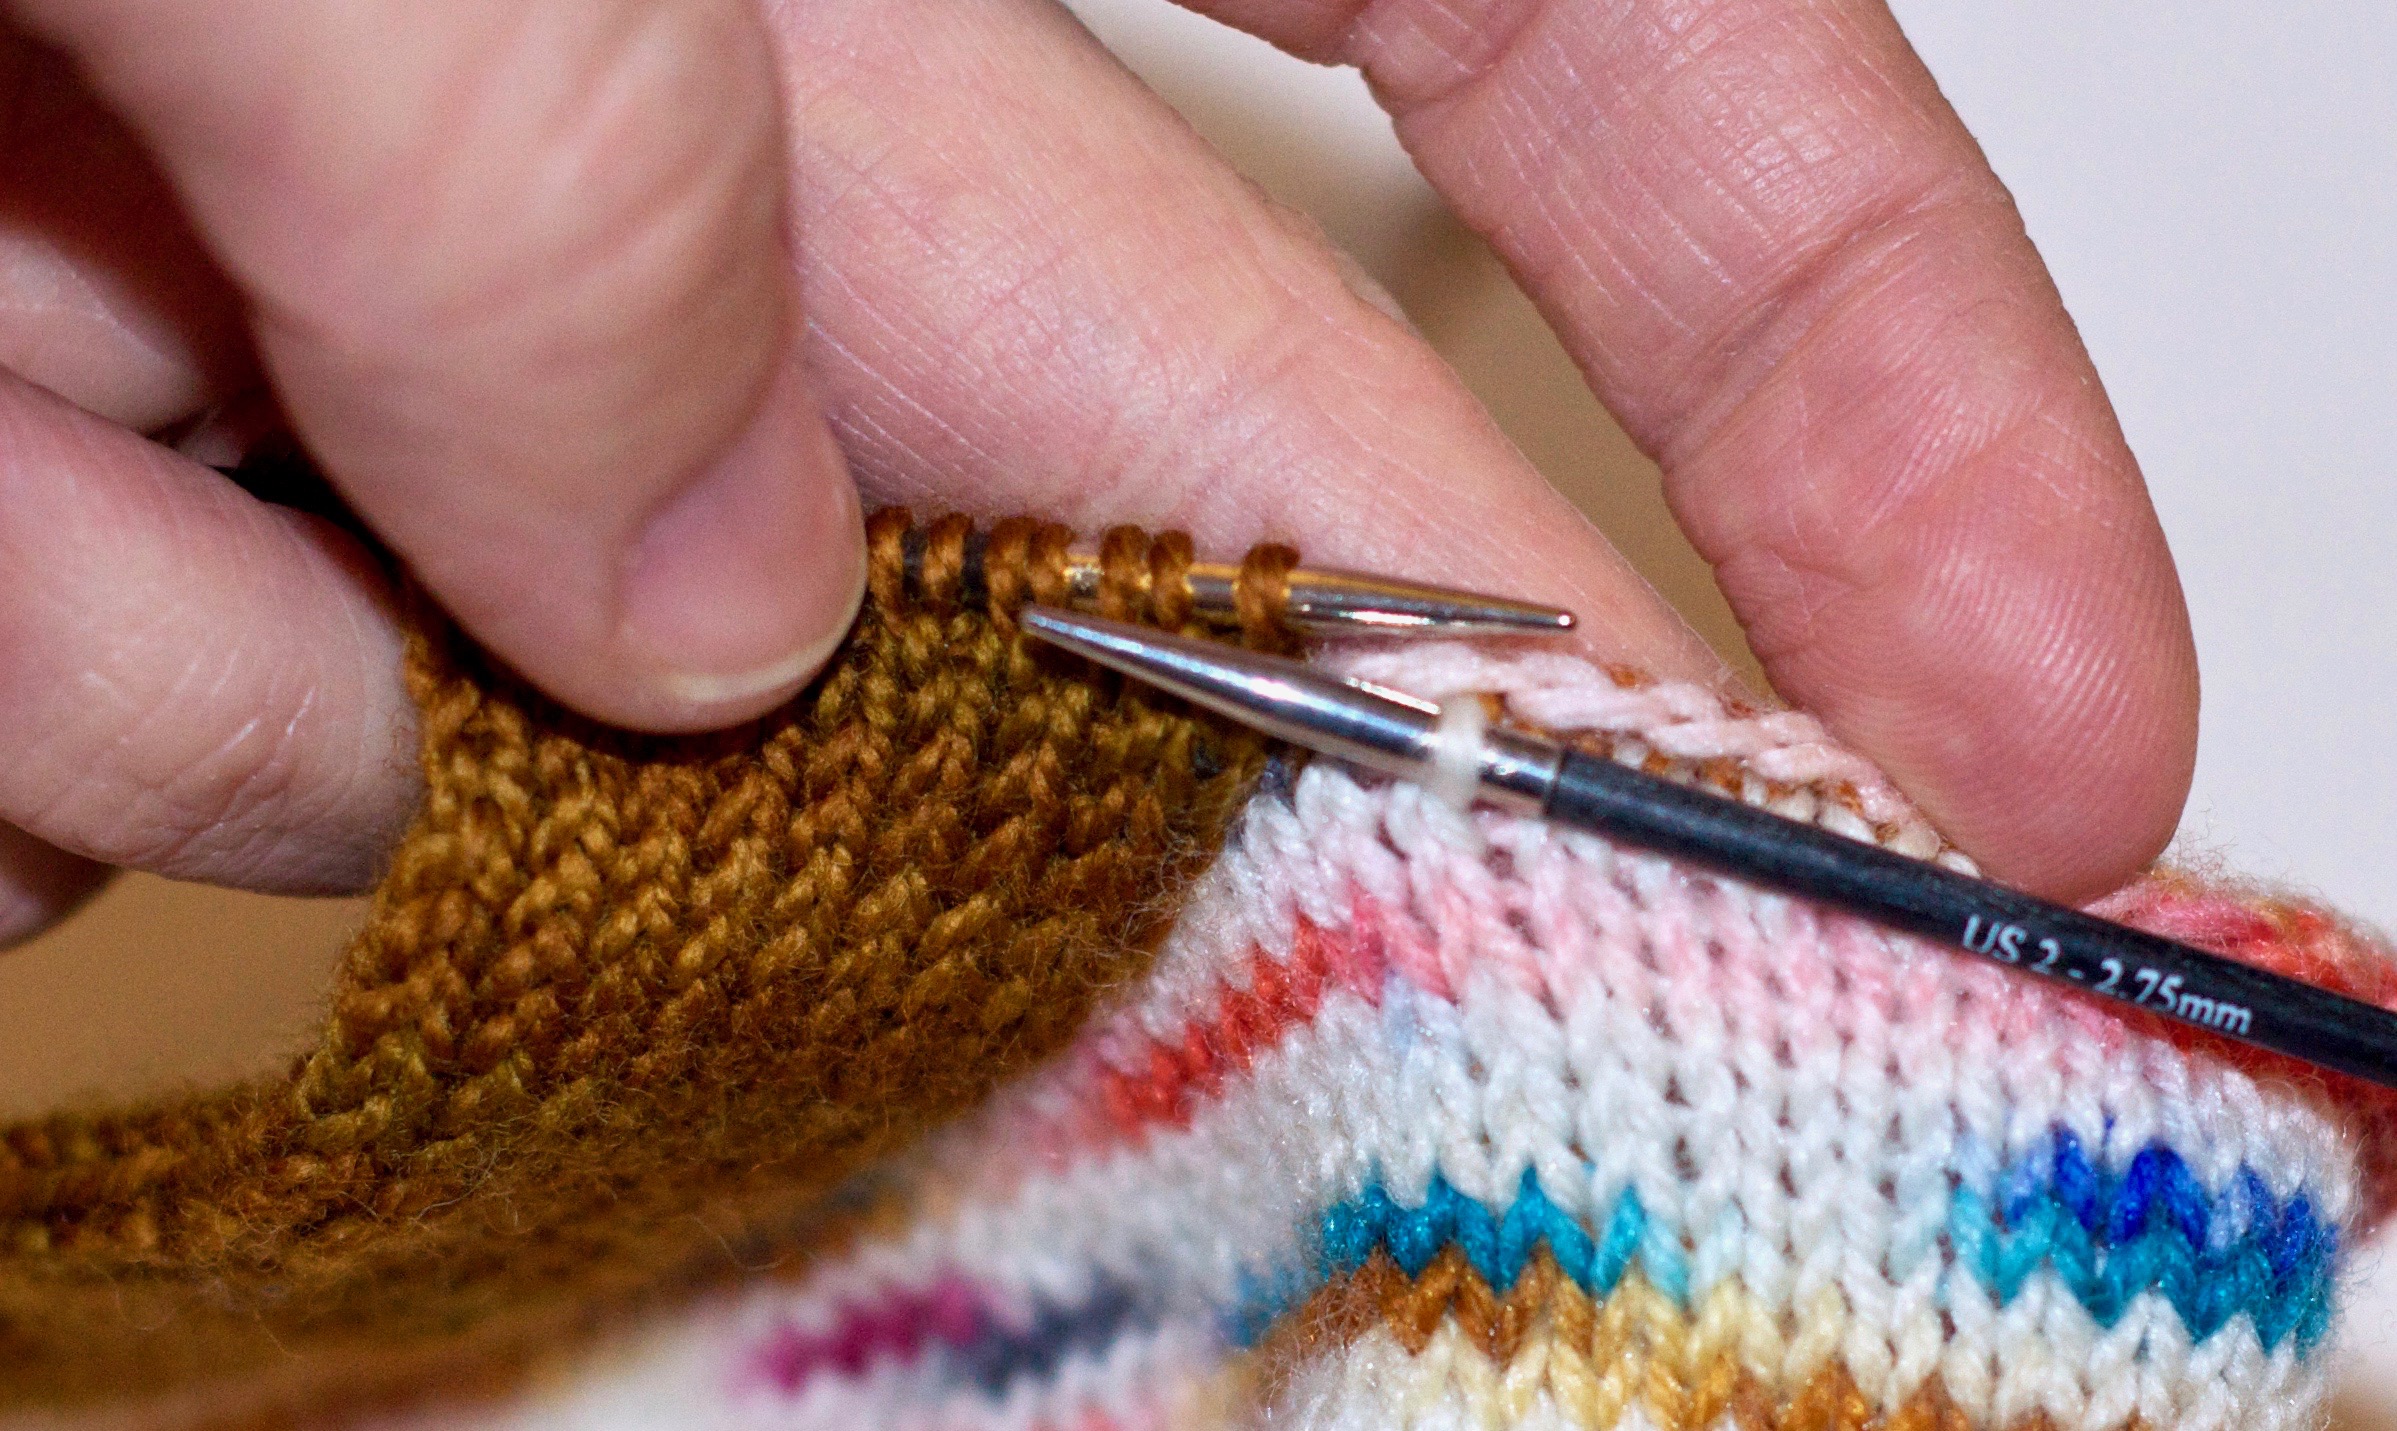
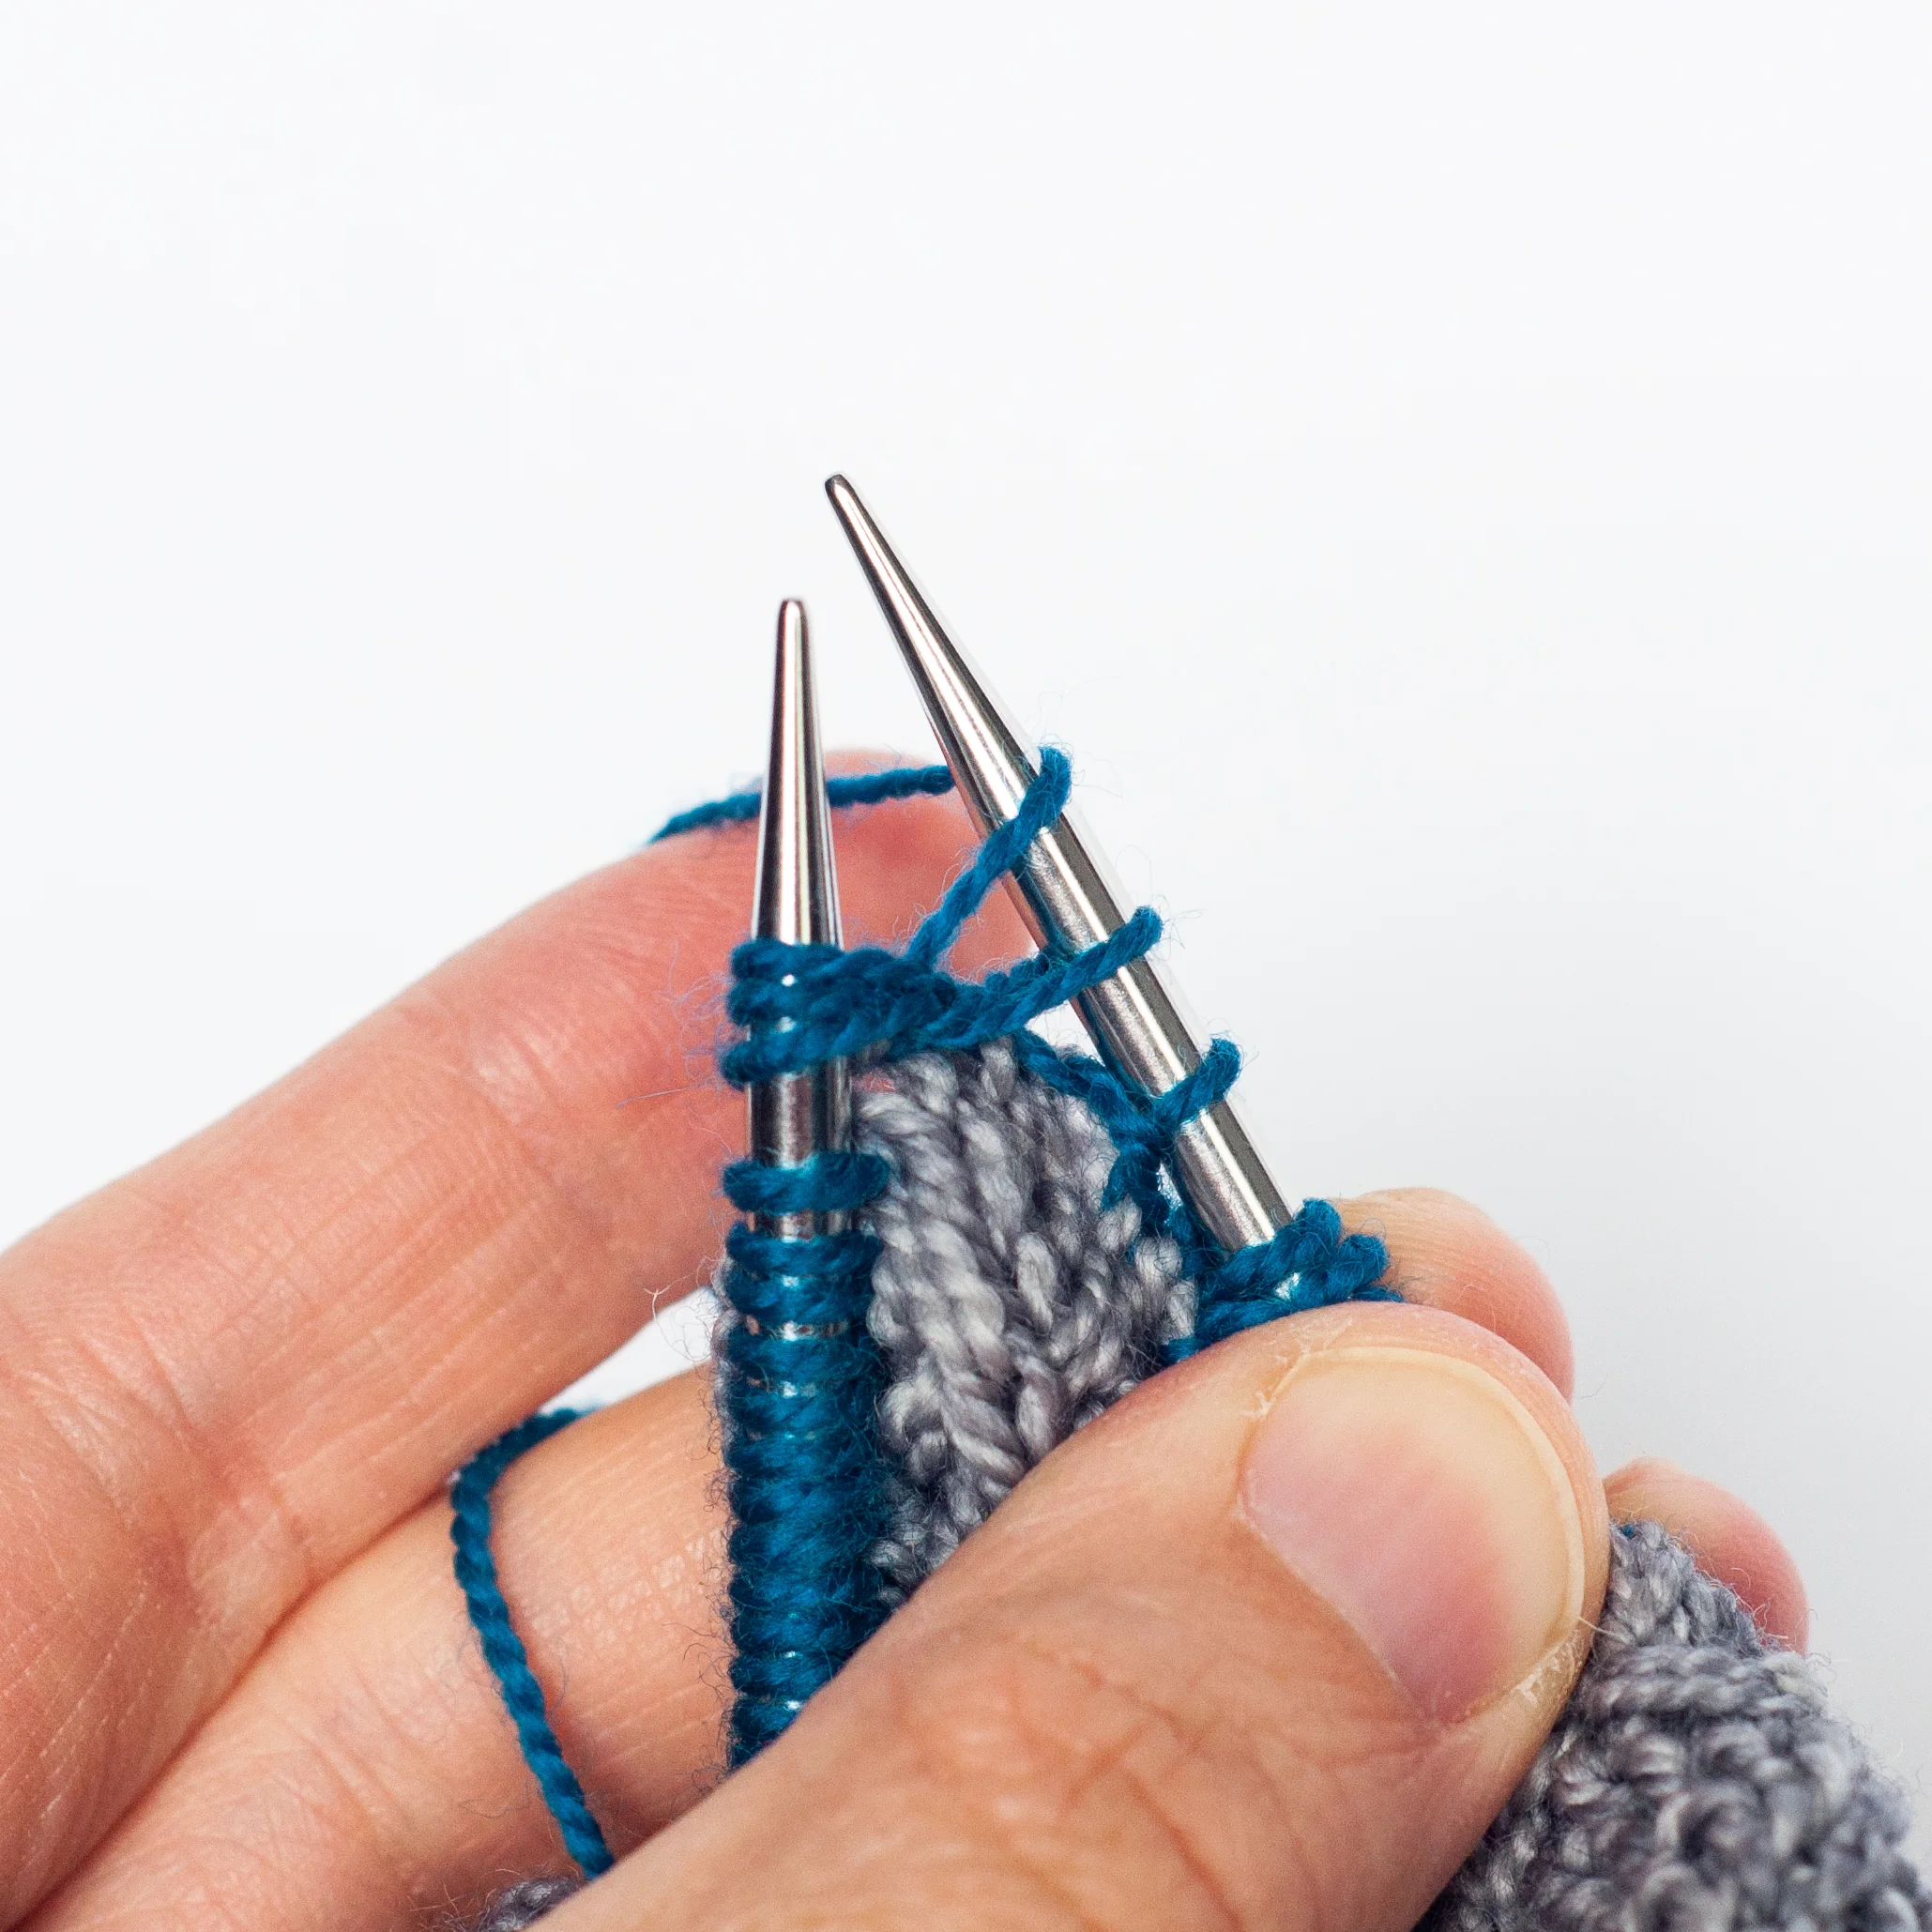
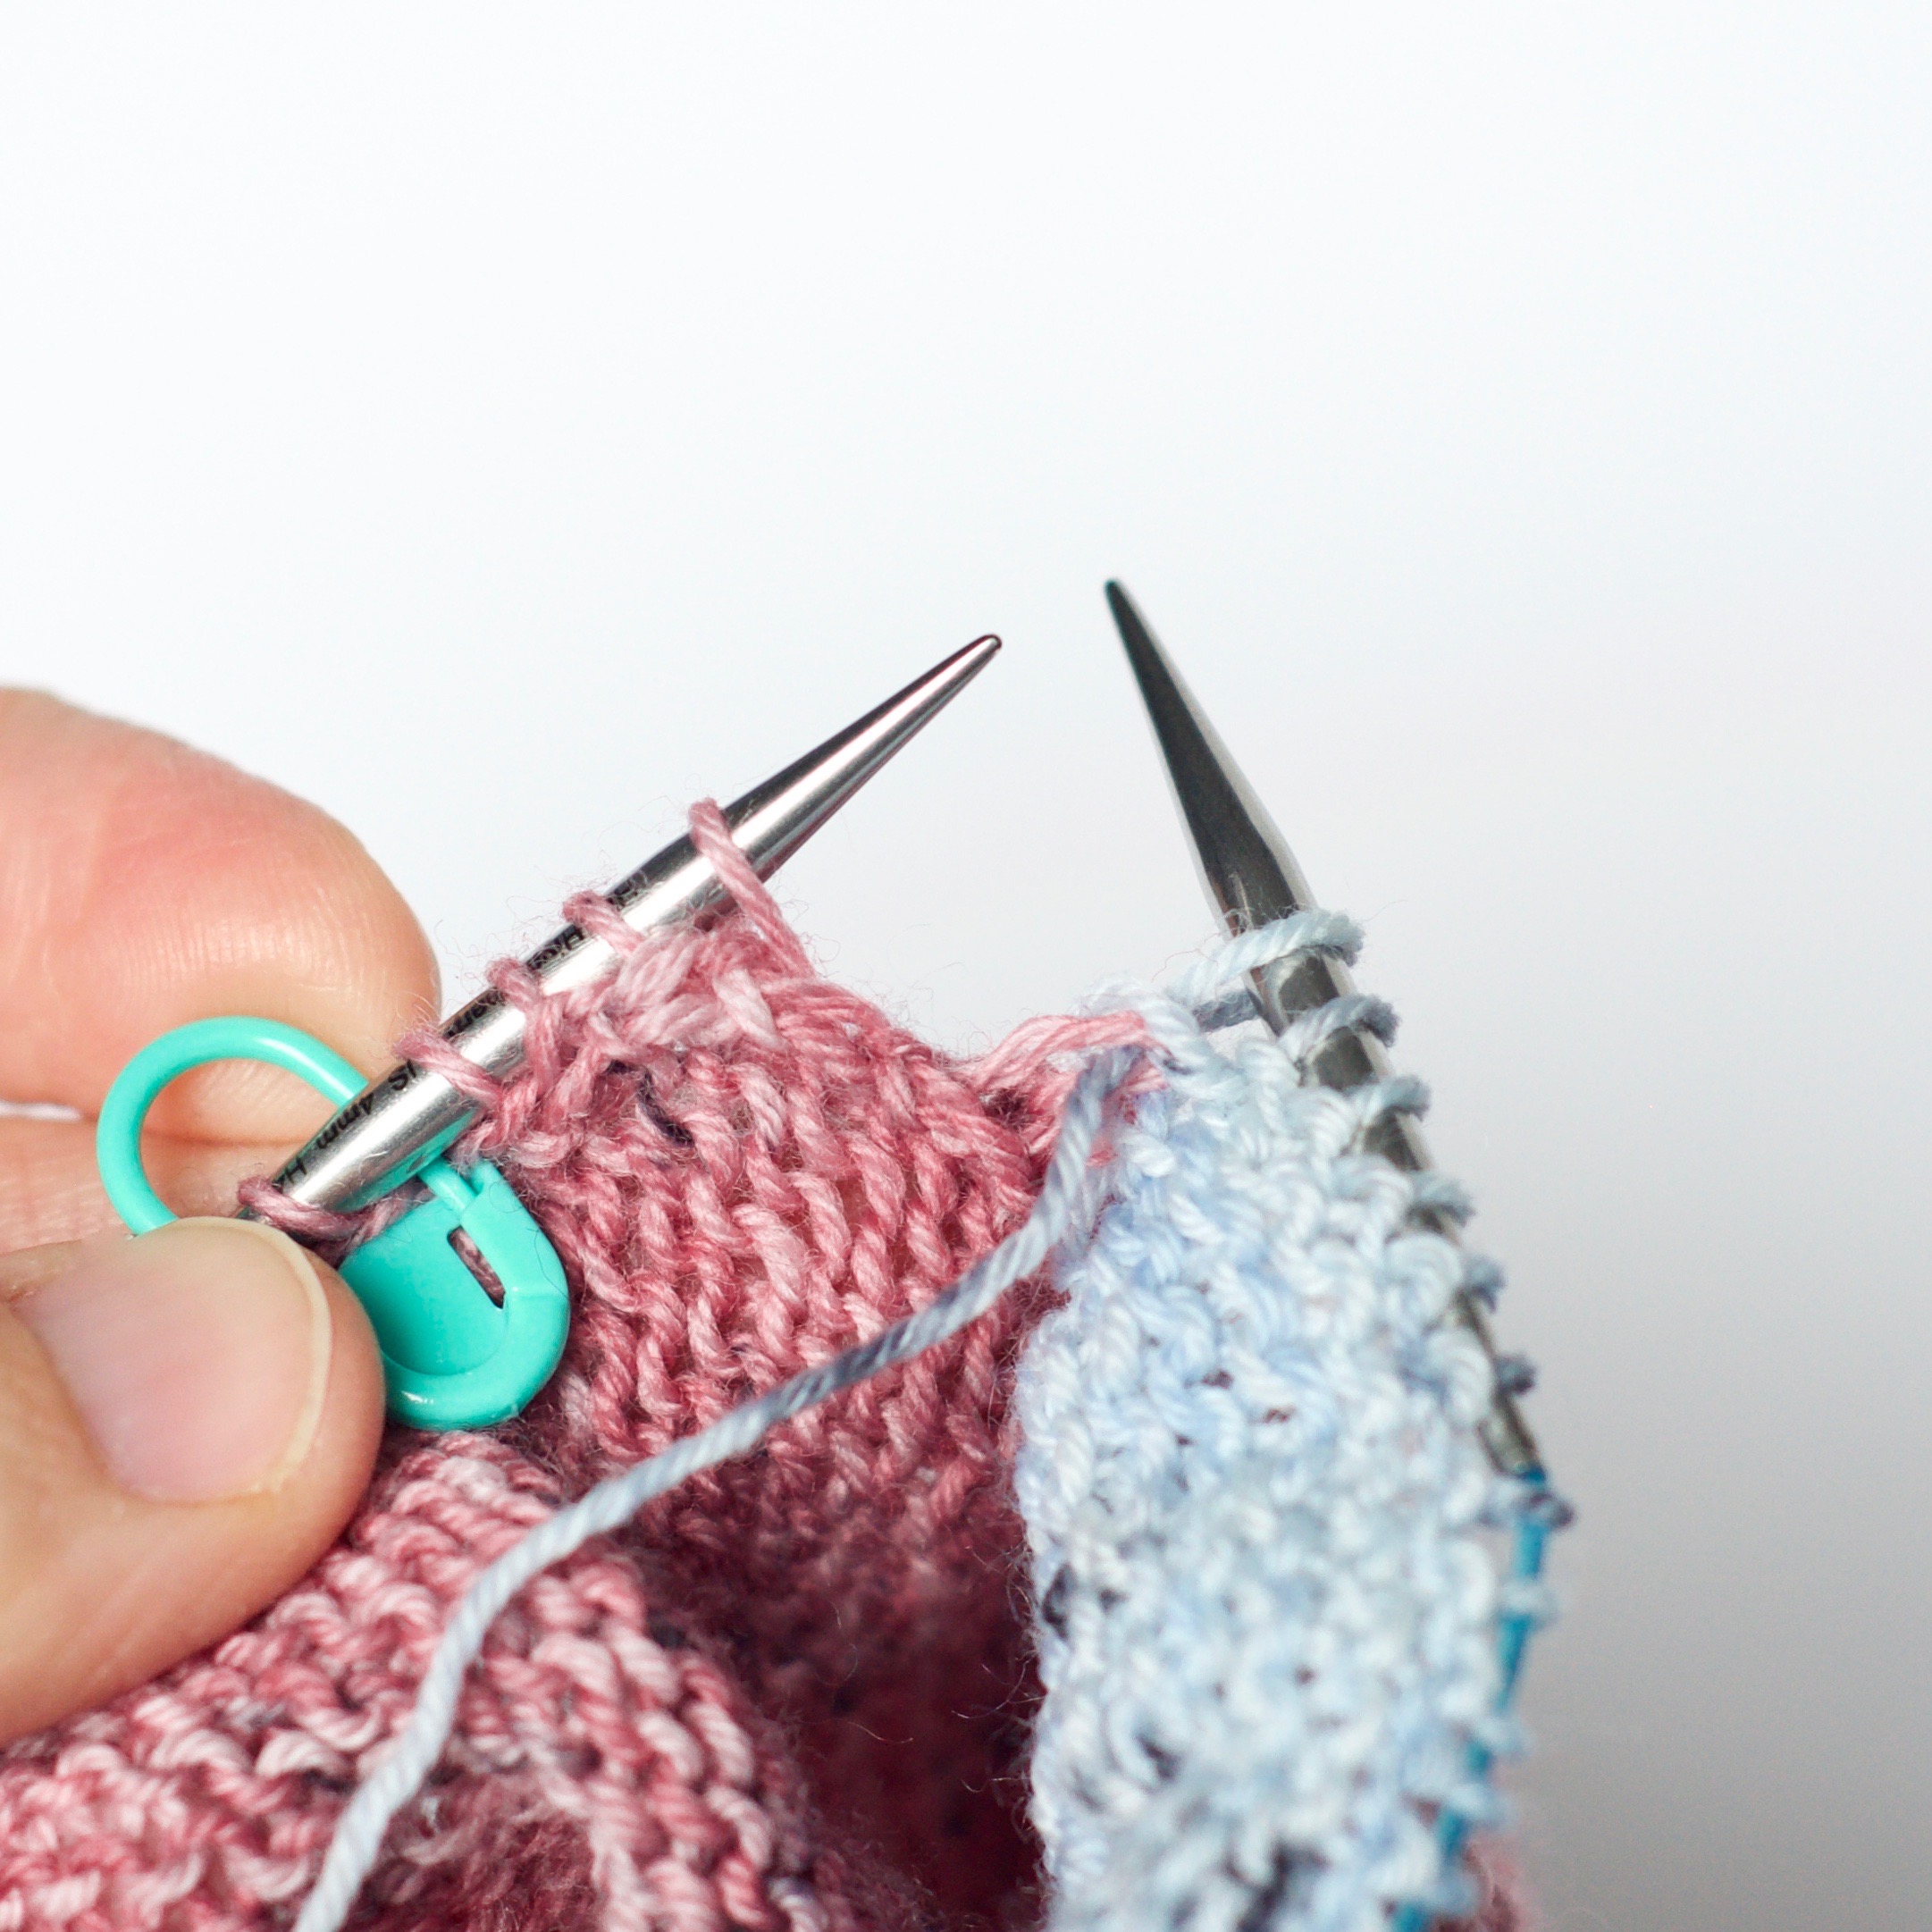
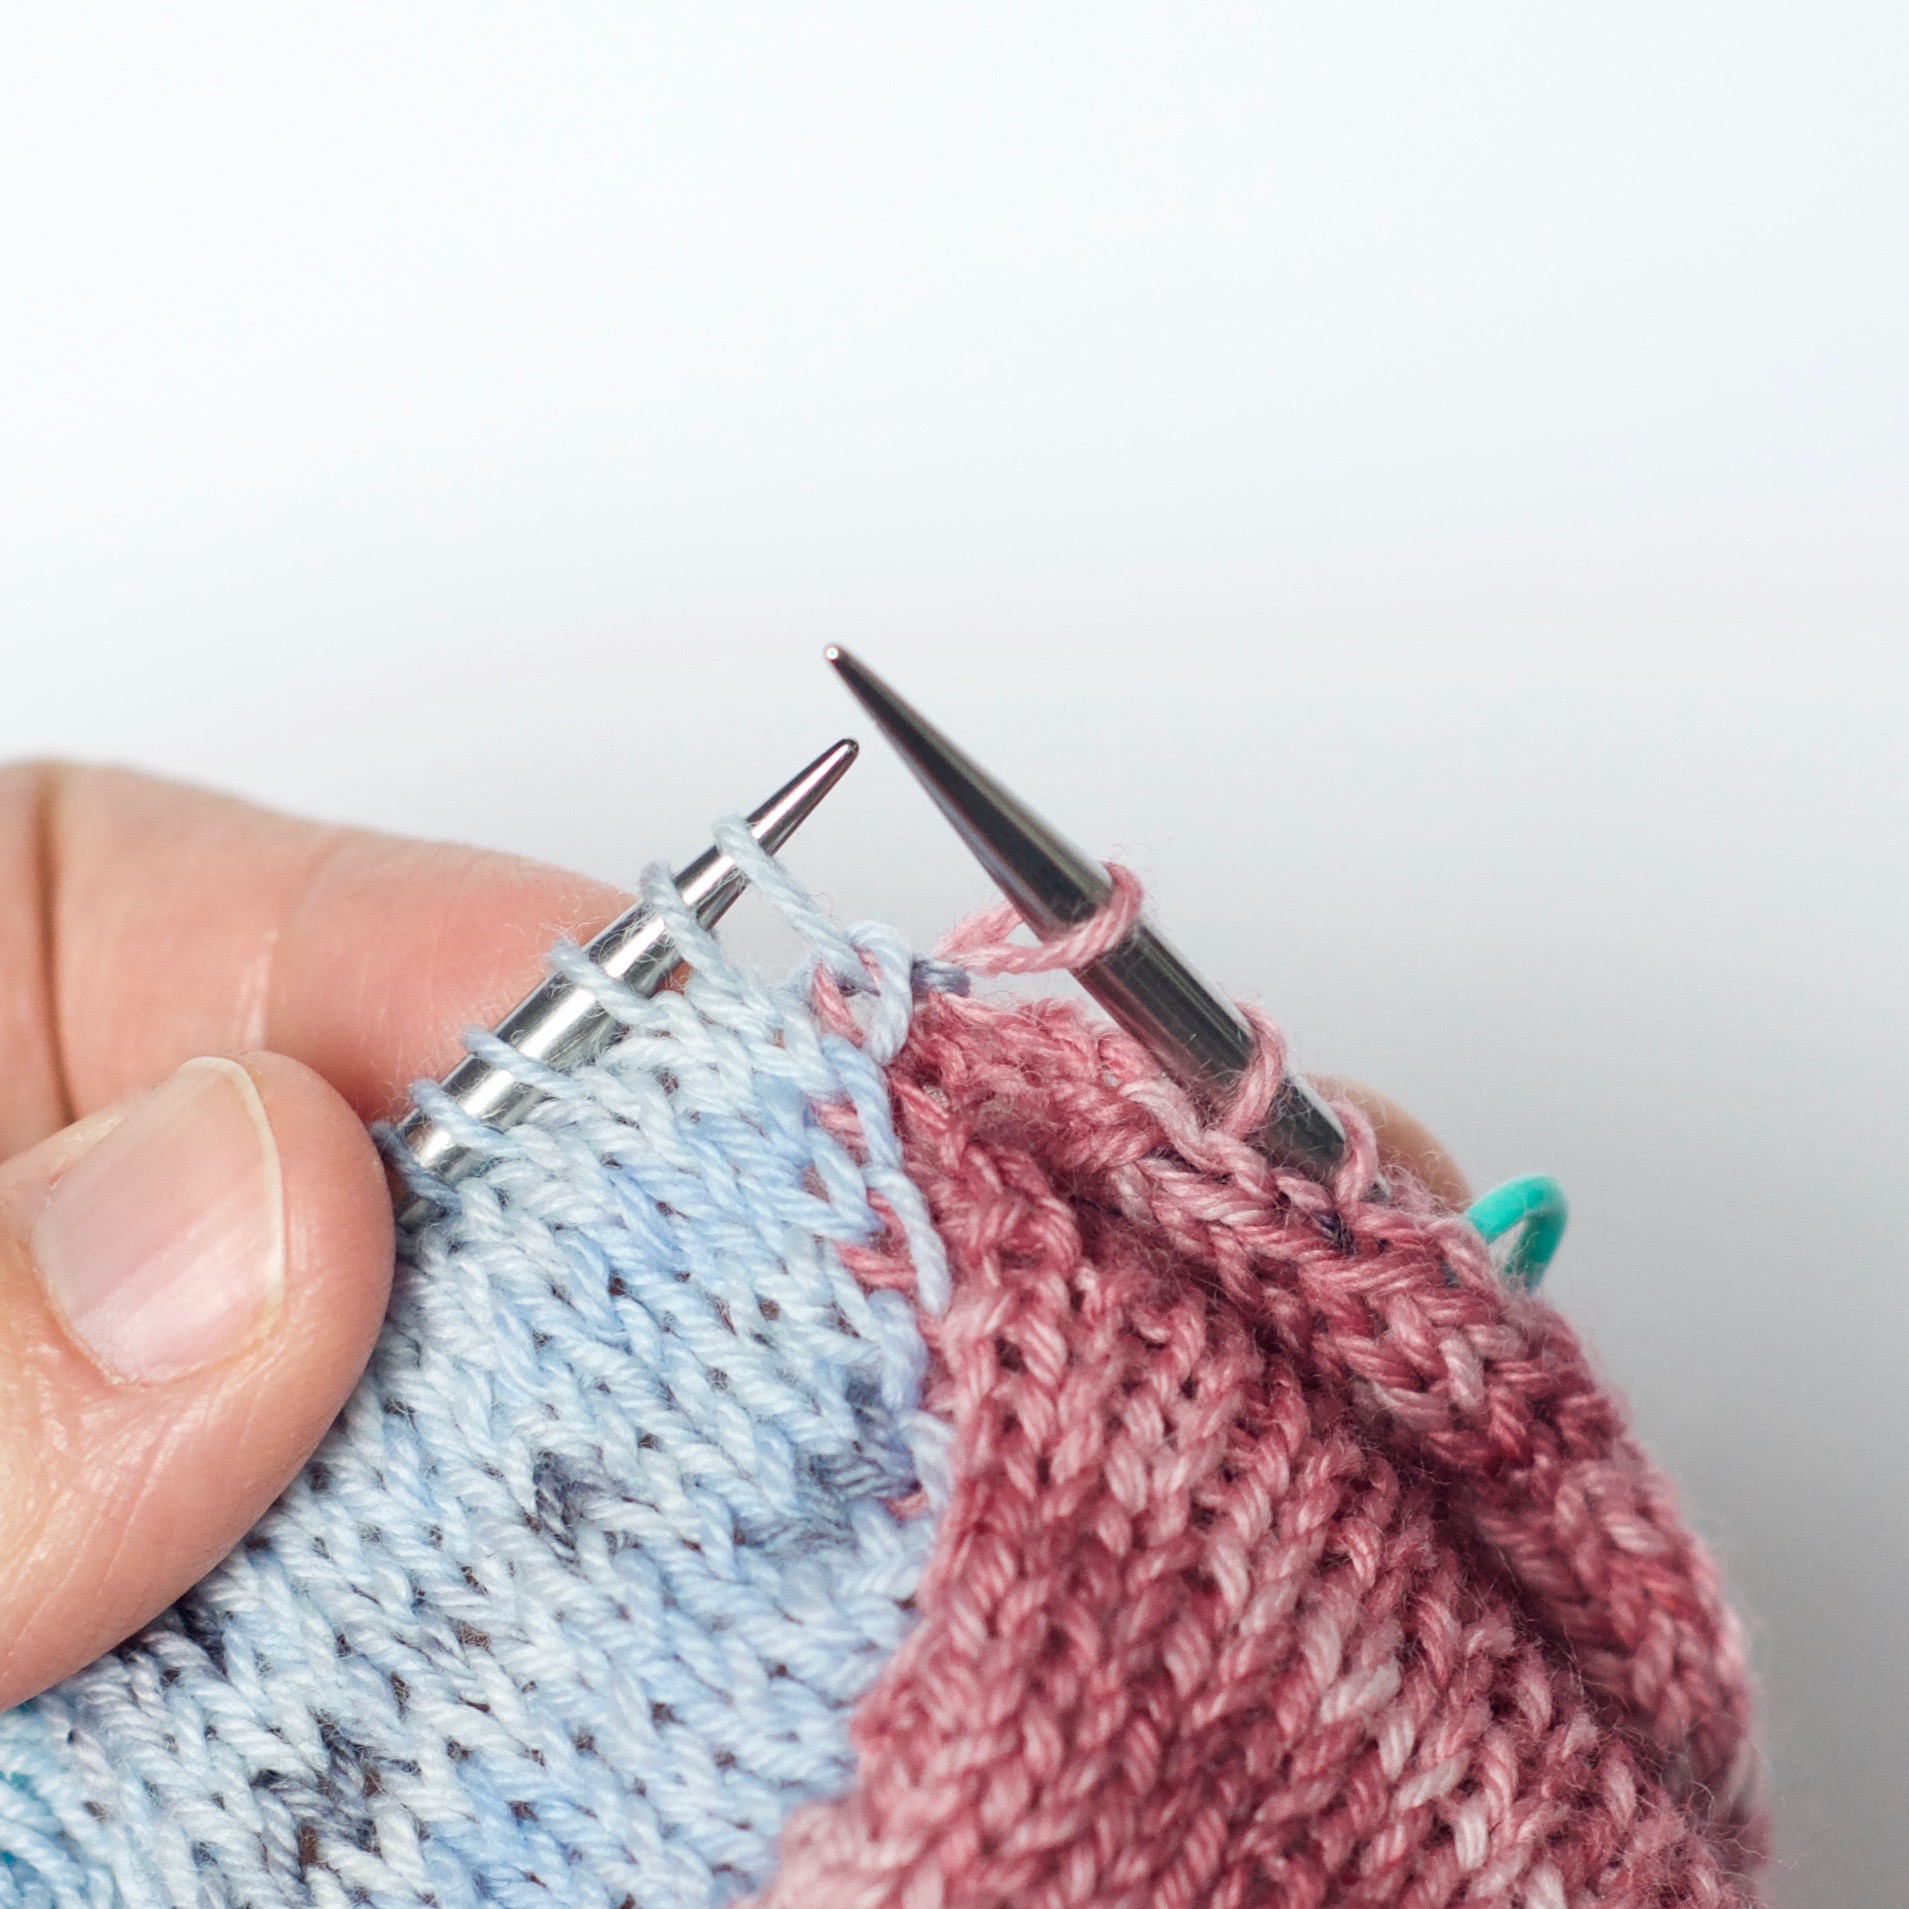
CREATING A DOUBLE STITCH

  1. WORK THE NUMBER OF STITCHES CALLED FOR ACCORDING YOUR YOUR PATTERN. TURN YOUR WORK.

STEP 1.jpg

2. BRING YOUR YARN TO THE FRONT

STEP 2.jpg

3. SLIP THE FIRST STITCH FROM YOUR LEFT HAND NEEDLE TO YOUR RIGHT HAND NEEDLE AS IF TO PURL.

STEP 3.jpg

4. BRING THE YARN OVER THE TOP OF THE RIGHT HAND NEEDLE TO THE BACK OF YOUR WORK. PULL TIGHT. THIS WILL CREATE A DOUBLE STITCH.

STEP 4-B.jpg
STEP 4.jpg

5. CONTINUE TO WORK ACCORDING TO YOUR PATTERN. KEEP TIGHTER TENSION THAN NORMAL FOR THE FIRST FEW STITCHES AFTER YOU CREATE THE DOUBLE STITCH.

RESOLVING THE DOUBLE STITCH

ONCE YOU HAVE CREATED A DOUBLE STITCH, YOU WILL NEED TO RESOLVE IT. YOU WILL NOT NEED TO DO THIS UNTIL YOUR PATTERN REQUIRES YOU TO KNIT OR PURL A DOUBLE STITCH THAT YOU HAVE ALREADY CREATED. WHEN YOU REACH YOUR DOUBLE STITCH, IT WILL LOOK SOMETHING LIKE THIS:

STEP 5.jpg

6. TREAT THE DOUBLE STITCH AS IF IT WERE A SINGLE STITCH. IF THE DOUBLE STITCH IS MEANT TO BE A KNIT STITCH, KNIT THROUGH BOTH LEGS OF THE DOUBLE STITCH. IF THE DOUBLE STITCH IS MEANT OT BE A PURL STITCH, PURL THROUGH BOTH LEGS OF THE DOUBLE STITCH AS IF IT WERE A SINGLE STITCH.

STEP 6.jpg

CONGRATULATIONS! YOU JUST WORKED GERMAN SHORT ROWS!

Sewn Bind Off

Sewn Bind Off in the Round

The Sewn Bind Off is my favorite bind off for collars, the tops of socks or fingerless mitts, or anything that needs a bit of extra stretch without losing structure. This bind off looks particularly nice with 1x1 ribbing. I recommend this technique in the Sock Arms patterns. You will need a tapestry needle for this technique.

  1. WHEN YOU HAVE COMPLETED YOUR WORK, AND ARE READY TO BIND OFF, CUT A LENGTH OF YARN APPROXIMATELY 3-4 TIMES THE LENGTH OF THE EDGE THAT YOU PLAN TO BIND OFF. THIS LENGTH OF YARN WILL STILL BE ATTACHED TO YOUR KNITTING. THREAD YOUR TAPESTRY NEEDLE.

DSC_0156.jpg

2. SLIDE YOUR TAPESTRY NEEDLE THROUGH THE FIRST 2 STS ON YOUR KNITTING NEEDLE PURLWISE WITHOUT REMOVING THE STS FROM YOUR KNITTING NEEDLE.

DSC_0161.jpg

3. PULL YOUR YARN GENTLY THROUGH THESE STITCHES. IF YOU PULL THE YARN TIGHT, IT WILL MAKE YOUR EDGE TIGHT.

DSC_0164.jpg

4. SLIDE YOUR TAPESTRY NEEDLE THROUGH THE FIRST STITCH ON YOUR KNITTING NEEDLE KNITWISE.

DSC_0169.jpg

5. PULL YOUR YARN GENTLY THROUGH THIS STITCH AND REMOVE IT FROM YOUR KNITTING NEEDLE.

DSC_0181.jpg

6. REPEAT STEPS 2-5 UNTIL YOU HAVE ONE STITCH REMAINING ON YOUR KNITTING NEEDLE.

7. SLIDE YOUR TAPESTRY NEEDLE THROUGH THE FIRST STITCH ON YOUR KNITTING NEEDLE KNITWISE.

DSC_0194.jpg

8. PULL YOUR YARN GENTLY THROUGH THIS STITCH AND REMOVE IT FROM YOUR KNITTING NEEDLE.

DSC_0196.jpg

9. INSERT YOUR TAPESTRY NEEDLE UNDER THE 2 LEGS OF YOUR FIRST BOUND OFF STITCH IN THE ROUND.

DSC_0202.jpg

10. INSERT THE TAPESTRY NEEDLE UNDER THE LEG OF THE FINAL BOUND OFF STITCH.

DSC_0204.jpg

THIS WILL CREATE A LOOP THAT IMITATES THE BOUND OFF STITCHES ALONG THE BOUND OFF EDGE OF YOUR WORK.

DSC_0216.jpg

11. PULL THE LOOP UNTIL ITS TENSION MATCHES THE TENSION OF THE OTHER STITCHES IN THE BOUND OFF EDGE.

DSC_0224.jpg

12. BREAK YARN, LEAVING A 6-INCH/15 CM TAIL. WEAVE IN THE END.

DSC_0229.jpg

TA DA! YOU HAVE JUST CREATED A FIRM, STRETCHY EDGE!

DSC_0233-2.jpg
DSC_0234.jpg

Latvian Braids

Latvian Braids

(Right & Left Leaning Latvian Braids)

Latvian braids are a beautiful way to integrate texture and color into your knitting. This technique is used in the Till Death MKAL mitten pattern. Below you will find instructions for working both the RIGHT & LEFT Leaning braids.

ROUND 1 (SETUP): * KNIT 1 COLOR A (SHOWN AS PINK), KNIT 1 COLOR B (SHOWN AS ORANGE), REPEAT FROM * TO END OF THE ROUND

DSC_0001.jpg

ROUND 2: BRING BOTH YARNS TO THE FRONT

DSC_0009.jpg

*PURL 1 COLOR A. BRING COLOR B UNDER COLOR A, PURL 1 COLOR B. BRING COLOR A UNDER COLOR B, REPEAT FROM * UNTIL THE END OF THE ROUND.

DSC_0016.jpg
DSC_0026.jpg

NOTE: YOU WILL ALWAYS USE COLOR A TO PURL A COLOR A STITCH. YOU WILL ALWAYS USE COLOR B TO PURL A COLOR B STITCH.

DSC_0052.jpg

YOUR YARN WILL BE TWISTED. DO NOT BOTHER UNTWISTING YOUR YARN. IT WILL UNTWIST ON ITS OWN IN ROUND 3.

ROUND 3: *PURL 1 COLOR A. BRING COLOR B OVER COLOR A, PURL 1 COLOR B. BRING COLOR A OVER COLOR B, REPEAT FROM * UNTIL THE END OF THE ROUND.

Tutorial-photo-with-text-1.jpg

WHEN YOU COMPLETE YOUR RIGHT LEANING BRAID, IT WILL LOOK LIKE THIS:

DSC_0121.jpg

FOR A LEFT LEAING LATVIAN BRAID, YOU WILL WORK THE SAME STEPS, BUT IN A DIFFERENT ORDER, AS FOLLOWS:

ROUND 1 (SETUP): * KNIT 1 COLOR A, KNIT 1 COLOR B, REPEAT FROM * TO END OF THE ROUND

ROUND 2: BRING BOTH YARNS TO THE FRONT. *PURL 1 COLOR A. BRING COLOR B OVER COLOR A, PURL 1 COLOR B. BRING COLOR A OVER COLOR B, REPEAT FROM * UNTIL THE END OF THE ROUND.

ROUND 3: *PURL 1 COLOR A. BRING COLOR B UNDER COLOR A, PURL 1 COLOR B. BRING COLOR A UNDER COLOR B, REPEAT FROM * UNTIL THE END OF THE ROUND.

DSC_0216.jpg

Attaching Your Glissade Waist Band

Attaching Your Glissade Waist Strap Stitches

[NOTE: This technique is used in the Glissade Shrug. The technique described below illustrates the attachment of the waist band to the body of the shrug.]

You will be attaching your waist band to the bottom edge of the shrug. You will be working from the bottom left corner of the shrug across to the bottom right, picking up 1 stitch in each stitch at the cast on edge, and approximately 2 stitches for every 3 rows along the ribbing.

DSC_0249.jpg

In order to create a clean edge where the chest band and the shrug meet, I recommend picking up sts one row below the cast on edge.

Fig.2.jpg

1. USING YOUR RIGHT HAND NEEDLE, PICK UP ONE STITCH FROM THE SHRUG.

DSC_0258.jpg

2. PLACE THE PICKED UP STITCH ONTO YOUR LEFT HAND NEEDLE.

DSC_0260.jpg

3. KNIT THE PICKED UP STITCH TOGETHER WITH THE FIRST STITCH OF YOUR CHEST BAND

DSC_0264.jpg

4. *s1 wyif, k1, repeat from * until 1 st remains, s1 wyif

Daisy Stitch using Knit Stitches

Daisy Stitch using Knit Stitches

[NOTE: There are many tutorials illustrating Daisy stitch using purl sts. However, I much prefer Daisy Stitch worked using knit stitches. This method is used in the Daisy Lady and Daisy Girl patterns. It is referred to as the 3k3 stitch.]

1. Insert right hand needle into 3 sts as if to k3tog.

DSC_0002.jpg

2. WRAP YARN AS IF TO KNIT.

DSC_0010.jpg

3. DRAW YARN THROUGH BUT LEAVE THE STITCHES ON YOUR LEFT HAND NEEDLE.

DSC_0014.jpg

4. YARN OVER.

DSC_0021.jpg

5. INSERT YARN INTO THE SAME 3 STITCHES.

DSC_0032.jpg

6. K3TOG

DSC_0043.jpg
DSC_0050.jpg
DSC_0002.jpg

Smocking Stitch

Smocking Stitch

[NOTE: This stitch is used in the Daisy Lady and Daisy Girl patterns and referred to as the smock3. The smock3 stitch uses the smocking stitch technique to create a smocking stitch of 3 stitches. However, this technique can be used to smock a larger number of stitches as well.]

1. Insert right hand needle from front to back between the 3rd and 4th stitches on the left hand needle.

[NOTE: If you would like to work a larger smocked stitch, insert needle between 2 stitches on your left hand needle as is appropriate for that stitch. For example, if you would like a 7-stitch smock, insert the needle between the 7th and 8th stitch.]

DSC_0350.jpg

2. Wrap yarn as if to knit.

DSC_0355.jpg

3. Pull up a loop.

DSC_0374.jpg

4. Place the loop on your left hand needle.

DSC_0395.jpg

5. k2tog (knit the new loop together with the first stitch)

DSC_0408.jpg
DSC_0411.jpg

6. knit 2

[NOTE: If you have chosen to work a smocking stitch with a larger number of stitches, then knit until you have worked all the stitches up to the edge of the loop placed in step 1.]

DSC_0066.jpg

Wrap & Turn : Purl Side

Wrap & Turn : Purl Side

1. Work to specified stitch (shown here as the 1st stitch on the right hand needle). Slip the next stitch purlwise.

2. Slip the next stitch purlwise.

DSC_0166.jpg

3. Bring yarn to the back.

DSC_0169.jpg

4. Slip stitch from right needle to left needle.

DSC_0180.jpg

5. Bring yarn to the front.

DSC_0182.jpg

6. Turn work so knit side is facing you.

DSC_0197.jpg

Wrap & Turn : Knit Side

Wrap & Turn : Knit Side

1. Work to specified stitch (shown here as the 2nd stitch from the right on the right hand needle). Slip the next stitch purlwise (shown here as the 1st stitch on the right hand needle).

DSC_0027.jpg

2. Bring yarn to the front.

DSC_0037.jpg

3. Slip stitch from right needle back to left needle.

DSC_0053.jpg

4. Bring yarn to the back.

DSC_0064.jpg

5. Turn work so purl side is facing you.

DSC_0070.jpg

How to Make a Pom Pom

How to Make a Pom Pom

1. Hold two pieces of your pom pom maker together. 

DSC_0069.jpg

2. Wrap yarn around the two pieces of the pom pom maker on one side. 

DSC_0078.jpg

3. Wind yarn back and forth until the maker is completely covered in several layers of wraps. 

4. Repeat Step 3 on second side. Cut yarn. 

DSC_0098.jpg

5. Close pom pom maker. 

6. Insert scissors between two sides of pom pom maker and cut yarn around the entire outer edge. 

DSC_0142.jpg

7. Place a length of yarn (approximately 12” long) between two sides of pom pom maker. 

8. Tie length of yarn as tightly as you can. This will slip two sides of pom pom maker apart. Double knot. 

9. Remove pom pom maker. 

DSC_0192.jpg

10. Trim the wonky bits. 

11. Fluff and Ta-Da!